

In this tutorial I will show you how to have current node field data (author name, author e-mail, node title, node path…) in e-mails generated by Webform using tokens. I will demonstrate in on the feature “when visitor will submit Webform block, send email with the current page title and current page url to the node author“.
For the impatient
This is the core: Apply this patch to the Token module and use token [current-page:node:author:mail] in Webform E-mail to configuration.
Demo
Dogva.com – every “puppy for sale” ad has a “contact node author” form below the body.
NOTE: Contact me if you want to add your site here
Required modules for the core functionality
For the core functionality within this tutorial I use Webform 7.x-4.10, Token 7.x-1.6 and the latest stable releases of the Chaos tool suite and Views.
Keywords you probably used until you found this solution
- When webform block submitted send email to node author and site admin
- How to use Webform as a replacement for User Contact form: Tokens for User Email?
- I want to create form on each content type “Event”
- Using node field data in emails using tokens?
- Webform: [node:title] or [current-page:title] tokens display title of webform instead of current page
- How to email the webform content to current page author email “Token [current-page:node:author:mail] is not working any more”
Lest’s start
1. Apply this patch for Token module (if the patch was committed, this is not actual anymore, see the end of this post).
NOTE: Applying patch is really easy. You can do it manually too (my preferred way). Here you can learn how to apply patch manually.
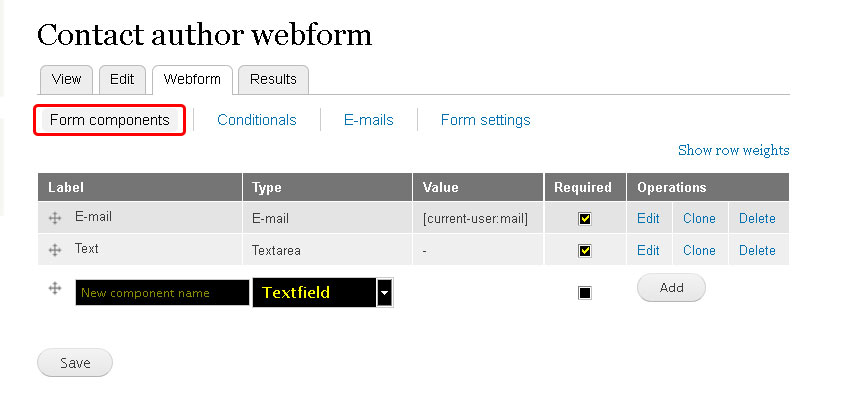
2. Create a new form. Under the tab Form components select the basic form fields. In my case I want only field E-mail (e-mail, required, predefined value: token [current-user-mail]) and field Text (textarea, required).
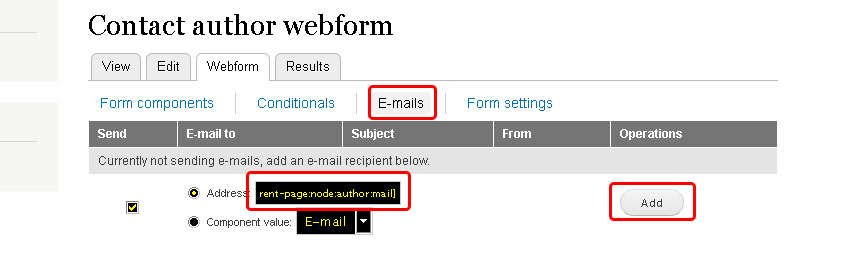
3. In the tab E-mails the trick starts. Use this token [current-page:node:author:mail] and click on the Add button. I will explain this token later.
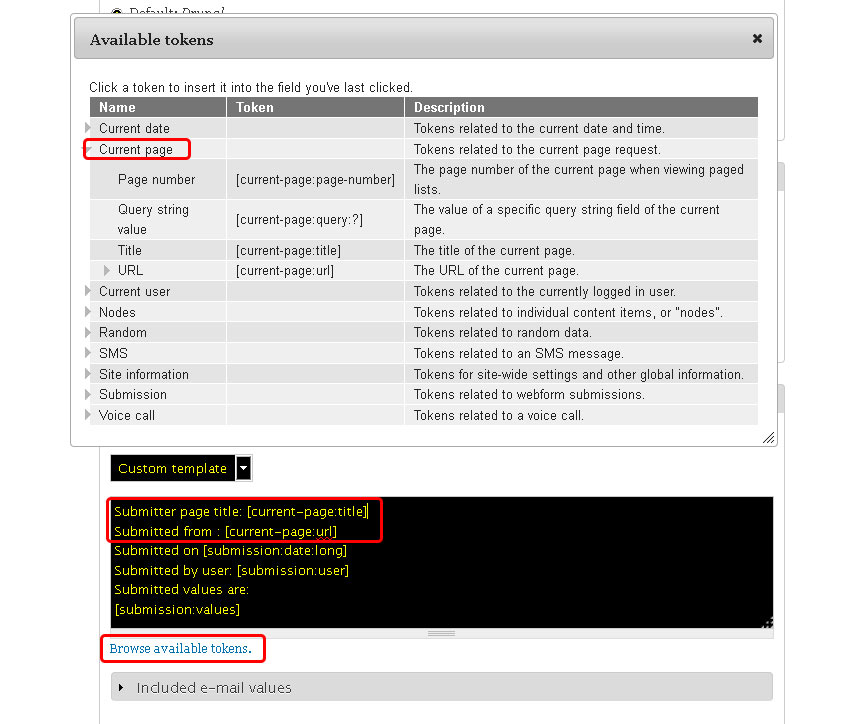
4. You can adjust E-mail subject with token [current-page:title]. Submission will contain the title of the current page (the node where Webform is enabled on).
Use an address tied together with the website domain name (default site mail) as an E-mail from address otherwise the majority of the webmail providers like Google (Gmail) will mark your message as a SPAM. Do not use submitted component e-mail.
I suggest you to use the Site name as an E-mail from name value.

5. Adjust the message body. Under the path Browse available tokens > Current page is available one more “obvious” token (aside of [current-page:title] which I already mentioned). It’s [current-page:url].
Why I wrote “obvious”? Because there’s “odd” token called [current-page:query:?] (within my code version; it may change in the future). This token does the main trick for me. It takes the email of the current node author. By “current node” I mean the node where Webform is enabled on. My part “query:?” is “node:author:mail“.
This “odd” token can extract each field of the current node and insert it into the message. For example token for the date the current node was posted will looks like:
[current-page:query:?] + [node:created] = [current-page:node:created]
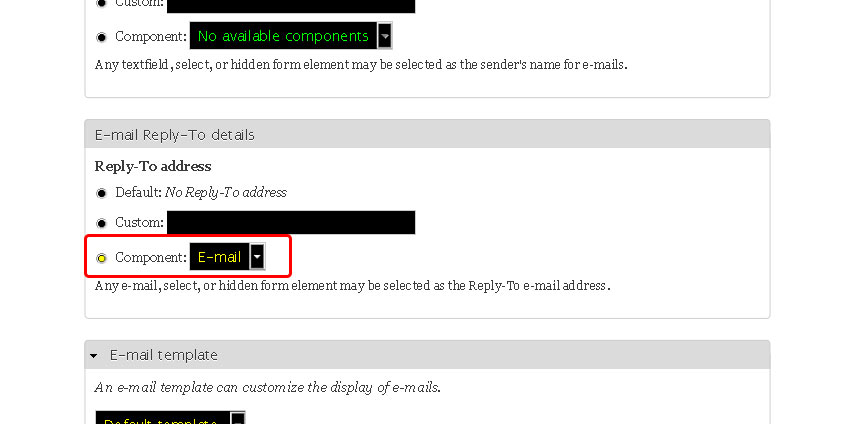
Bonus: Reply-to enhancement
As I wrote, do not use the value submitted by users in the E-mail from address option. Mail providers think it’s a SPAM. Many hosting providers will not allow you to do it anyway (they don’t have rights to generate emails for domains out of their control).
But there’s a problem. When the user (author of the current node) click on the “reply to this message” button, e-mail will be delivered to our “[email protected]“, not to the user who submitted the form.
Is there any solution for this? Yes, the module has name Webform Reply To. It specifies Reply-To details (chose “e-mail” component submitted by user).
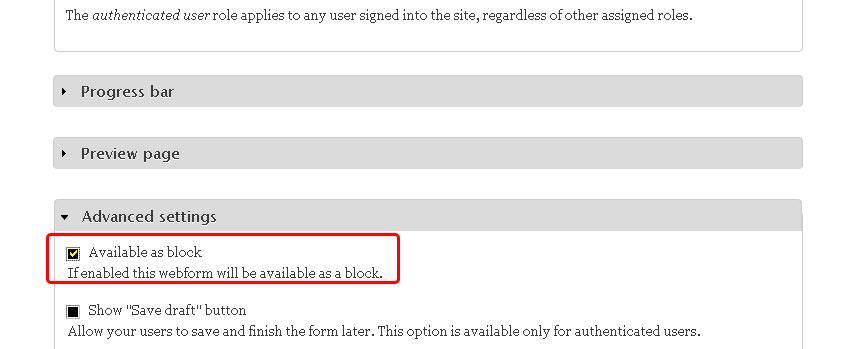
6. Save the e-mail configuration and go to the tab Form settings. Under Advanced settings check Available as block and hit the Save configuration button. Now the form will be available as a block.
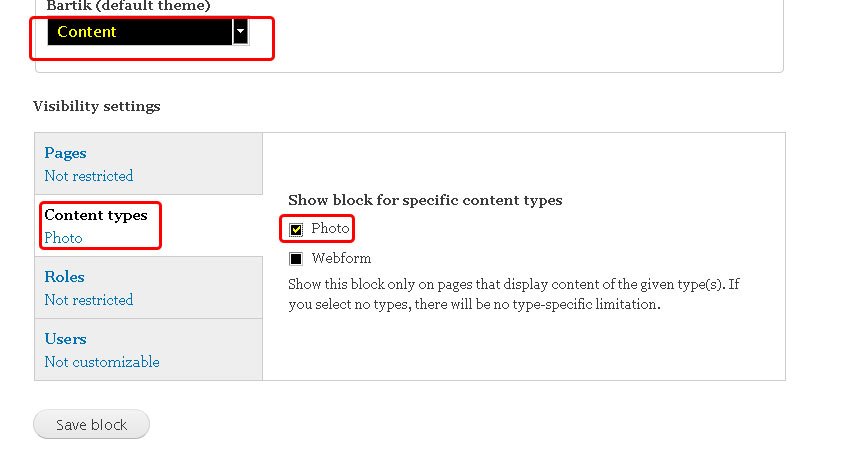
7. Go to Structure > Blocks and configure new Webfrom block.

I placed a block into Content region and turned it on only for Photo content type.
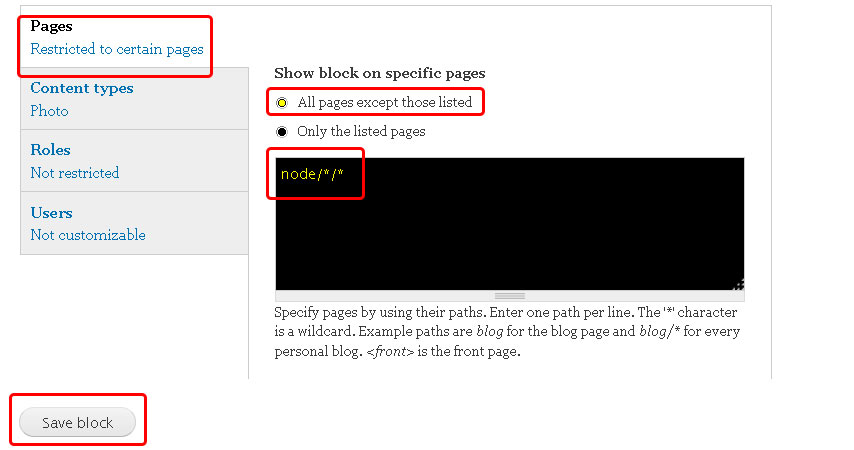
Also, don’t forget to specify restricted pages. Use node/*/* in order to display block only on the node page (otherwise the block will be displayed on the node edit page too). Save the configuration when done.
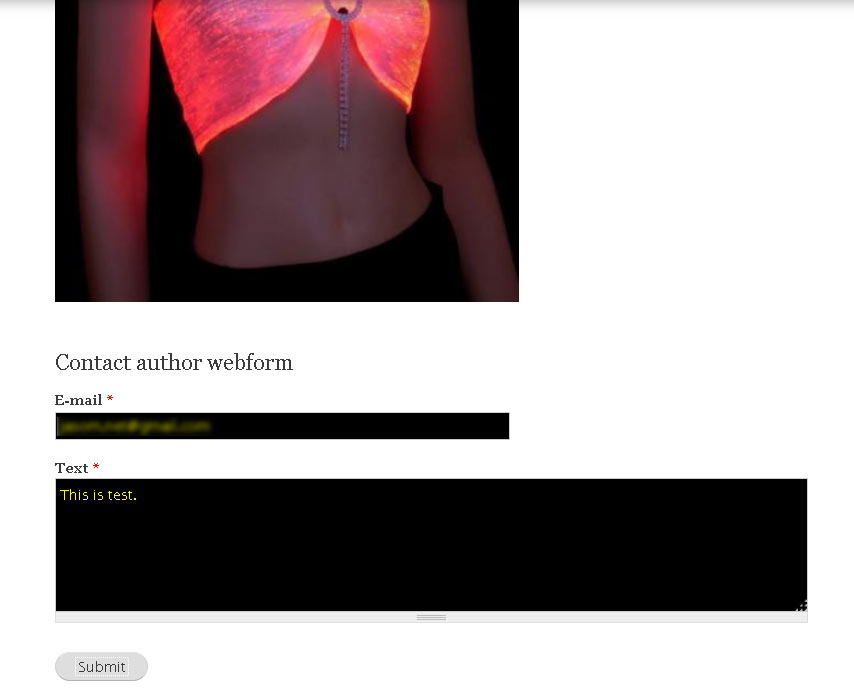
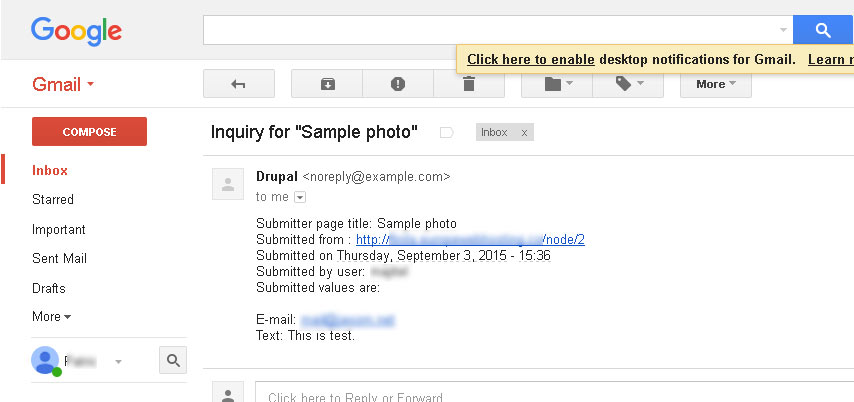
7. Done. This is how the form looks like under the enabled node type. The node’s title is Sample photo.
This is how the submission looks like in the webmail.
Why I wanted this feature
Website in general is a communication tool, medium. Basically, it’s a distribution channel which helps you to deliver your information. Communication in online world is essential. For each online project is important to have opened as many communication channels as possible.
“Nothing good can come from a lack of communication.”
— David Kiger
In conclusion: Which action YOU can take next?
Request the patch being committed. If the patch was committed contact me and I will update this post.
Today status: Not committed
Last update: Sept, 2015
Do you need any help with Drupal configuration? Contact me or use the comment form below.
Leave a Reply